
How to Paint Kitchen Cabinets Yourself: A Step-by-Step Guide
Last modified: October 29, 2026
Quick answer
To paint kitchen cabinets yourself: remove doors and hardware, label them, degrease and sand every surface, prime, apply two or more thin coats of cabinet-grade paint, let each coat dry fully, and wait several days before rehanging. Expect the job to take a week or more. Most failures come from skipped prep or rushing the drying time.
Painting your own kitchen cabinets is a real project, not a weekend touch-up. It can be done, and plenty of homeowners do it, but the result depends almost entirely on preparation and patience. Rushing any step usually shows up later as chips, brush marks or a finish that never quite feels hard. Here is how to paint kitchen cabinets yourself, step by step.
This guide walks through the full process honestly, so you can decide whether to tackle it yourself, get some professional help, or hand it over completely.
Before you paint kitchen cabinets yourself: what the job involves
Cabinet painting takes longer than most people expect. Every door and drawer front has two sides and edges, each coat needs to dry, and your kitchen is partly out of action the whole time. You also need a clean, dust-free space where doors can lie flat or hang while they dry.
Ask yourself a few questions first:
- Do you have the time to work through cleaning, sanding, priming and several coats without cutting corners?
- Do you have a space, such as a garage or spare room, to work on doors away from cooking and dust?
- Are the doors in good shape, or are some swelling, peeling or damaged?
- How long can you manage with a partly working kitchen?
What you’ll need
- Screwdriver or drill, plus bags and labels for hinges and hardware
- Degreasing cleaner suited to kitchen grime
- Sandpaper or sanding sponges in medium and fine grits
- Painter’s tape, drop cloths and plastic sheeting
- A bonding primer suited to your cabinet surface
- A durable paint made for cabinets or trim
- Good quality angled brush and fine foam or microfibre rollers
- Something to lay doors on or hang them from while they dry
Step-by-step: how to paint kitchen cabinets
1. Empty the cabinets and protect the room
Clear out the cabinets you are working on and cover counters, floors and appliances. Tape off walls, backsplash and the cabinet interiors where the frames meet them.
2. Remove doors, drawer fronts and hardware
Take off every door and drawer front, along with hinges, handles and knobs. Number each piece and the spot it came from, for example with tape inside the hinge hole. This makes reinstalling far easier.
3. Clean and degrease
Kitchen cabinets collect a thin layer of cooking grease, especially near the stove. Paint will not bond well to it. Clean every surface thoroughly, rinse, and let everything dry completely.
4. Sand to give the primer some grip
Scuff-sand all surfaces with a medium grit, then smooth with a fine grit. You are not trying to remove the old finish, just dull the shine so primer can grip. Wipe away all dust before moving on.
5. Prime
Apply a thin, even coat of primer to doors, drawer fronts and frames. Primer helps the paint stick and gives you an even base, which matters most when you are going from a dark wood tone to a light colour.
6. Paint in thin coats
Brush the edges and detailed areas first, then roll the flat surfaces. Several thin coats look better and hold up better than one or two heavy ones. Lightly sand between coats if the paint instructions suggest it, and let each coat dry fully.
7. Let the paint cure before heavy use
Paint can feel dry to the touch long before it is fully hard. Follow the curing time on the product, and be gentle with the doors in the meantime.
8. Reinstall and adjust
Put the hardware back, rehang the doors in their numbered spots and adjust the hinges so the gaps line up evenly.
Where DIY cabinet painting usually goes wrong
Most problems trace back to a few common shortcuts:
- Skipping the degreasing: the paint looks fine at first, then peels where hands and cooking grease touch it most.
- Heavy coats: thick paint sags, shows brush marks and takes much longer to harden.
- Using wall paint: wall paint is not made for surfaces that are handled many times a day.
- Rushing back into use: doors that go back on too soon can stick, mark or chip.
- Painting over damage: swelling or peeling doors will still look swollen or peeling under new paint.
A middle option: the DIY Kitchen Update Kit
Doors and drawer fronts are the hardest part to get right at home, and the parts people see and touch most. Our DIY Kitchen Update Kit splits the job. We professionally refinish your doors and drawer fronts in our shop, and you paint the frames with the materials and guidance included in the kit.
There are two versions. With the Novice Kit, we remove, refinish and reinstall your doors. With the Expert Kit, you handle removal, delivery, frame painting, pickup and reinstalling. Tool rentals are available if you need them.
When professional refinishing makes more sense
If the steps above sound like more than you want to take on, professional cabinet refinishing keeps your existing doors, drawer fronts and boxes and changes the colour and finish for you.
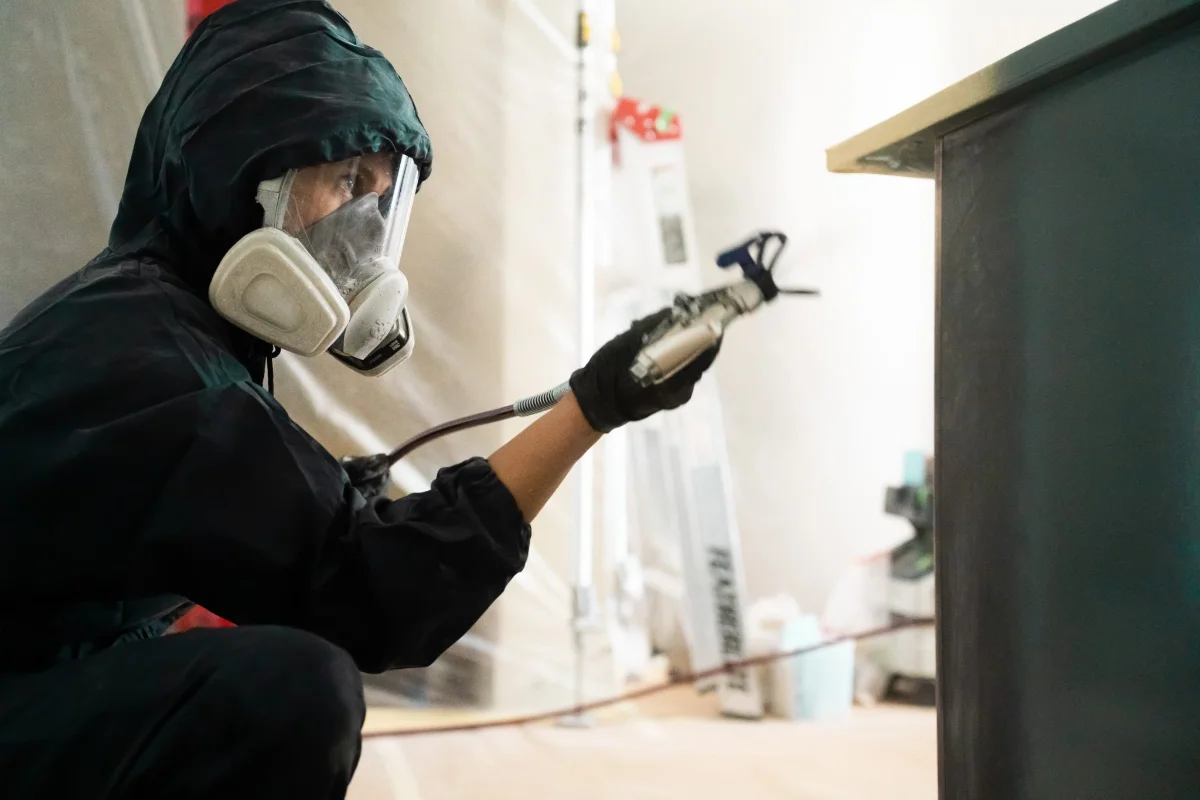
Doors and drawer fronts are removed and sprayed in our shop with an industrial two-component coating, then bake-cured, a factory-grade process. The frames are finished in your home. There are about four days of work in your home, with a 7 to 10 day gap while the doors are in the shop, and refinishing comes with a written 3-year warranty.
For a rough idea of budget, try our kitchen cost calculator. When you are ready, book a free in-home quote and we will give you clear, line-item pricing.
Frequently asked questions
Do I have to sand cabinets before painting them?
In most cases, yes. A light scuff-sand after cleaning dulls the old finish so primer and paint can grip. Skipping it is one of the most common reasons painted cabinets peel.
Can I paint cabinets without taking the doors off?
You can, but it is harder to get an even finish on edges and hinge sides, and paint can build up where doors meet frames. Removing doors and drawer fronts takes longer to set up but gives a cleaner result.
How is the DIY Kitchen Update Kit different from painting everything myself?
With the kit, your doors and drawer fronts are professionally refinished in our shop, so the most visible parts get a factory-grade finish. You only paint the frames, using the materials and guidance in the kit.


